
Custom wood blinds are a popular window covering option for homeowners who want a warm, natural, and polished look. They can provide privacy, control natural light, and complement different interior styles while adding a finished appearance to windows. However, installing custom wood blinds requires careful measurements and proper bracket placement because incorrect installation can lead to uneven blinds, poor operation, or damage to the window frame. At ShadesLA, our goal is to help homeowners choose and install custom window coverings that fit their windows properly and provide reliable everyday performance. We provide custom wood blinds for homeowners looking for attractive, functional, and professionally fitted window solutions.
Why Can Custom Wood Blind Installation Be Difficult?
The main reason custom wood blind installation can be difficult is inaccurate measuring or improper bracket placement. Even small measurement mistakes can cause the blinds to sit unevenly, interfere with the window, or operate poorly.
Several factors can make installation more challenging, including:
- Incorrect window measurements
- Uneven or damaged window frames
- Limited space for inside mounting
- Large or wide windows
- Heavy wood blinds
- Difficult-to-access windows
- Improper bracket positioning
- Weak mounting surfaces
- Incorrect screws or wall anchors
Taking accurate measurements and following the manufacturer’s installation instructions can help prevent these problems. Professional installation can also help ensure the blinds are securely mounted, properly aligned, and easy to operate.

Essential Tools for Installing Custom Wood Blinds
- Measuring tape
- Pencil
- Level
- Screwdriver
- Power drill
- Appropriate drill bits
- Mounting brackets
- Screws
- Wall anchors when required
- Valance clips
- Step ladder
- Safety glasses
Having the correct tools ready before starting can make the installation process easier and help ensure the mounting hardware is installed securely.
Accurate Measuring for Custom Wood Blinds
Accurate measurements are one of the most important parts of installing custom wood blinds. For inside mounts, the window width should be measured at the top, middle, and bottom, while the height should be checked at the left, center, and right. Recording the measurements carefully helps ensure the blinds are made to fit the window opening properly. Each window should be measured separately rather than assuming multiple windows are exactly the same size.
How to Install Custom Wood Blinds
Step 1: Unpack and Check the Hardware
Carefully remove the custom wood blinds from the packaging and check that all mounting brackets, screws, valance clips, and other hardware are included. Keep the blinds protected until you are ready to install them.
Step 2: Position the Mounting Brackets
For an inside mount, position the brackets near the top corners of the window frame and make sure they are level and properly aligned. For an outside mount, center the blind over the window and mark the bracket locations on the wall or window trim.
Step 3: Mark and Drill the Screw Holes
Use a pencil to mark the screw-hole locations. Check the alignment with a level, then create small starter holes before securing the brackets. If the installation surface requires anchors, use the appropriate hardware for that surface.
Step 4: Secure the Brackets
Fasten the mounting brackets with the supplied screws. If center support brackets are included, install them in the recommended positions without interfering with the blind’s internal mechanisms. Make sure all brackets are straight and securely attached.
Step 5: Attach the Valance Clips
Before installing the blind, attach the valance clips to the headrail according to the manufacturer’s instructions. Space the clips evenly and make sure they will not interfere with the operating mechanism.
Step 6: Install the Headrail
Carefully place the headrail into the mounting brackets. Once it is properly positioned, close or lock the bracket covers until they securely snap into place. Make sure the headrail is firmly supported before moving to the next step.
Step 7: Attach the Valance and Wand
Snap the decorative valance into the installed clips. If your custom wood blinds use a wand, attach it to the tilt mechanism according to the supplied instructions. Make sure the valance does not interfere with the wand or other operating components.
Step 8: Test the Blinds
After completing the installation, slowly test the blinds to make sure everything works properly.
Check for:
- Smooth raising and lowering
- Proper slat tilting
- Secure headrail
- Level positioning
- Firmly attached valance
- Proper clearance around the window
- Smooth operation without rubbing or obstruction
If the blinds feel difficult to operate or appear uneven, stop and check the bracket alignment and headrail installation before continuing to use them.
Inside Mount vs. Outside Mount Custom Wood Blinds
Choosing the right mounting style can affect both the appearance and functionality of your custom wood blinds.
Inside Mount
Inside mounting places the blinds inside the window frame. This creates a clean and built-in appearance and allows more of the existing window trim to remain visible.
This option works best when the window frame has enough depth to accommodate the blinds and mounting hardware.
Outside Mount
Outside mounting places the blinds on the wall or window trim around the opening. This can be useful when the window does not have enough depth for an inside mount.
An outside mount can also provide greater window coverage and help reduce light gaps around the edges.
Common Mistakes to Avoid When Installing Wood Blinds
Avoiding common installation mistakes can help your blinds operate properly and last longer.
- Failing to measure the window correctly
- Installing brackets unevenly
- Skipping pilot holes when they are needed
- Using unsuitable screws or wall anchors
- Mounting the headrail without checking its alignment
- Overtightening screws
- Forgetting to secure the bracket latches
- Installing the valance incorrectly
- Not testing the blinds after installation
- Forcing the blinds when they do not operate smoothly
Careful preparation and following the manufacturer’s instructions can prevent many of these problems.
Supporting Wide Custom Wood Blinds
Wide custom wood blinds may require additional support brackets to keep the headrail secure. Center support brackets should be positioned carefully so they provide stability without interfering with the blind’s internal operating mechanisms. The brackets should also be properly aligned and securely attached to the mounting surface before the headrail is installed.
How to Maintain Custom Wood Blinds After Installation
Proper maintenance can help keep custom wood blinds looking attractive and operating smoothly.
Regularly remove dust from the slats using a soft cloth or appropriate duster. Avoid excessive moisture because real wood can be sensitive to water and humidity. If the blinds become difficult to operate, check for obstructions and inspect the mounting hardware.
Do not force the blinds if they become stuck. A professional can inspect the operating mechanism if the problem continues.
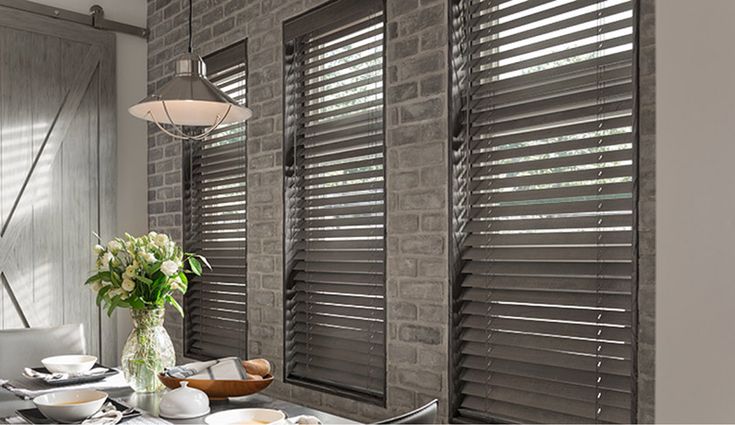
Why Professional Wood Blind Installation Matters
Installing custom wood blinds requires more than simply attaching the brackets to the wall or window frame. Professionals understand how to check measurements, position mounting brackets correctly, align the headrail, secure the hardware, and ensure the blinds operate smoothly. Proper installation can help prevent uneven blinds, loose brackets, operating problems, damage to the window frame, and unnecessary adjustments.
At ShadesLA, we focus on careful installation and proper fitting from start to finish. We provide expert custom wood blinds in Pasadena, CA to help homeowners achieve the right fit, privacy, light control, and finished appearance based on their window and room requirements.
Professional installation can be especially helpful for large windows, difficult-to-access areas, multiple blinds, or installations requiring specialized mounting hardware. Experienced installers can complete the process carefully while making sure the blinds are securely mounted, properly aligned, and ready for everyday use.
Final Thoughts
Installing custom wood blinds can be a manageable home improvement project when the measurements are accurate and the mounting hardware is installed correctly. Taking time to position the brackets, use a level, securely install the headrail, and test the blinds can help create a clean and reliable finished installation.
Whether you choose DIY installation or professional help, proper fitting and careful installation are important for achieving smooth operation, attractive appearance, privacy, and long-lasting performance.
FAQs
1. How Do You Install Custom Wood Blinds?
Measure the window, choose the mounting type, install and level the brackets, attach the headrail, add the valance, and test the blinds.
2. Can You Install Wood Blinds Yourself?
Yes. Basic wood blind installations can often be completed with a measuring tape, level, screwdriver, and drill when the correct instructions are followed.
3. Should Wood Blinds Be Installed Inside or Outside the Window?
Both options are available. Inside mounting fits the blinds within the window frame, while outside mounting places them over the window opening.
4. Do Wood Blinds Need Center Support Brackets?
Some wider wood blinds require center support brackets. Their placement should allow the headrail and operating components to work without interference.
5. How Do You Make Sure Wood Blinds Are Level?
Use a level when positioning the mounting brackets and check their alignment before securing the headrail.